How to Make Pour Over Coffee: The Perfect Cup of Coffee
So if you’re asking yourself how to make the perfect cup of coffee, maybe you should be asking what is the best way to make coffee? Then you should ask yourself How To Make Pour Over Coffee. It’s actually easier than you think.
Related: The 10 Best Espresso Machines
There’s a reason that 83 percent of adults drink coffee (that’s about 5 out of 6). Coffee tastes great, gives you a jolt of energy and gets you ready to conquer that intimidating pile of work on your desk.
What If There Was A Better Cup of Coffee?
Some people say that coffee is coffee, there’s not much difference. But you and I both know that isn’t the truth. The only people who say that are those who haven’t tasted a great cup.
Pour-over coffee is your key to making consistently amazing tasting coffee. The best part is that you can do it at home, and it’s fairly inexpensive.
Your quest for the best coffee ends today, right here.
There are many brewing techniques to make a cup of coffee, but one stands above the rest: pour-over coffee. This guide: “The Best Way To Make Coffee“, will show you how to make and replicate the perfect coffee recipe.
Pour-over coffee is your key to making consistently fantastic tasting coffee. The best part is that you can do it at home, and it’s relatively inexpensive.
What is Pour-Over Coffee and Why Is It The Best Coffee Brewing Method?
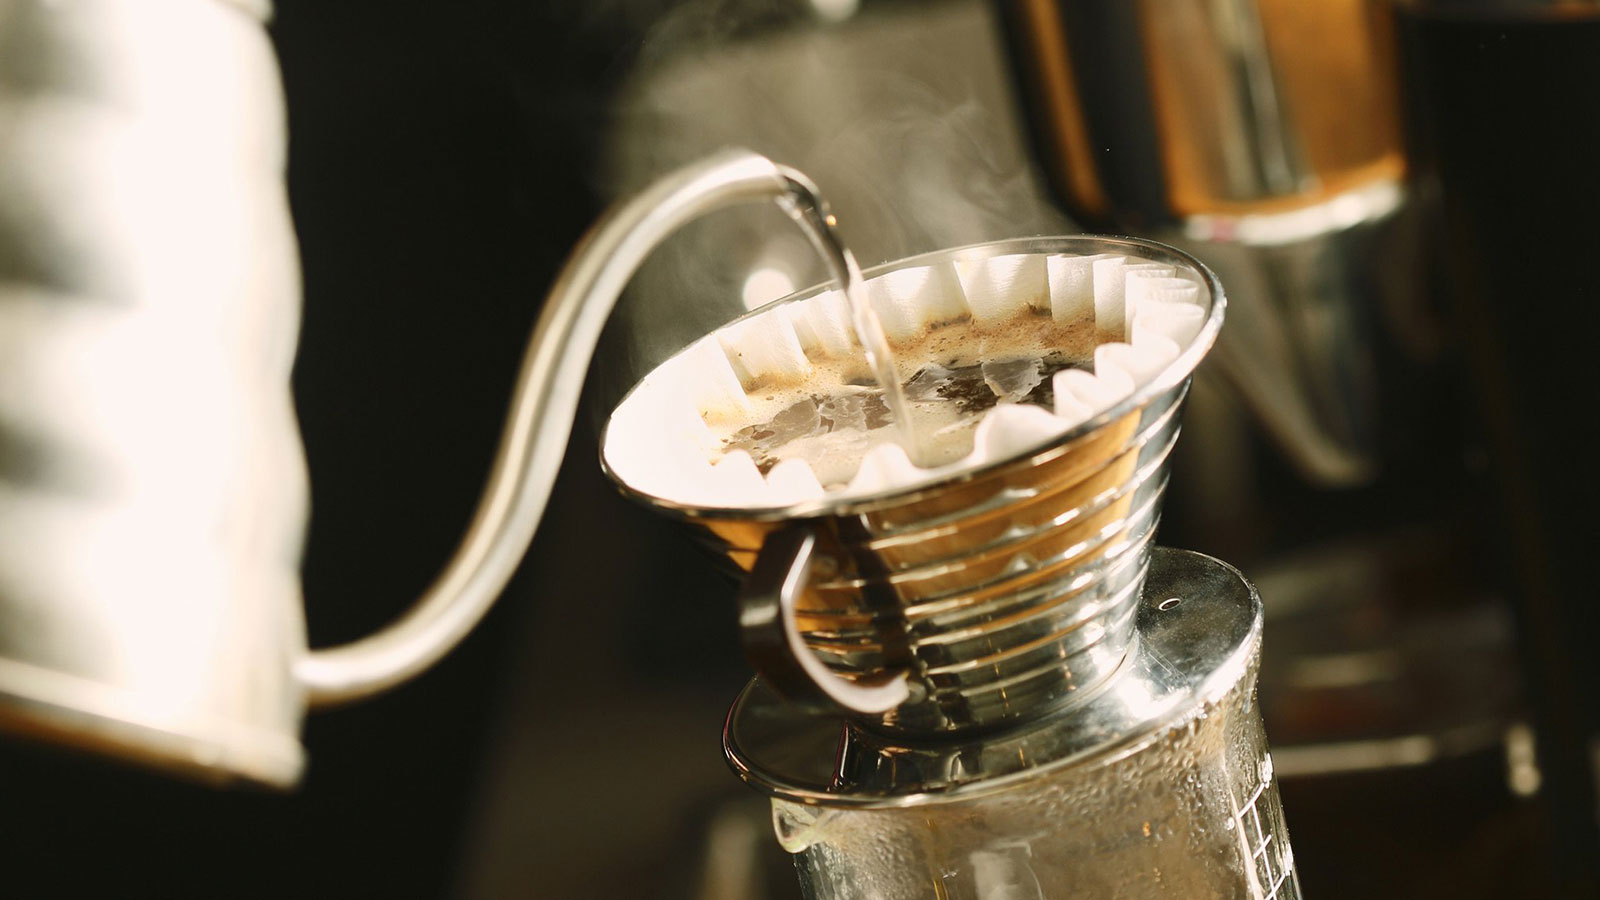
Pour-over coffee involves slowly pouring hot water over finely ground coffee beans. The filter holds the beans in a way that allows the water to slowly but continuously pass through. This method ensures an efficient and effective transfer of coffee nutrients from the beans into the water, and subsequently a fantastic tasting cup of coffee.
Not only is pour-over coffee better tasting and higher quality than most alternatives, but a complete transfer of coffee nutrients means that it is healthier as well. These nutrients provide a number of benefits to the regular coffee drinker. Finally, the equipment needed is also much cheaper than a fancy coffee maker.
What Is The Equipment of Pour-Over Coffee Connoisseurs?
The process of making pour-over coffee is quite simple but effective. Much like tea, it requires little equipment.
There are eight main pieces of equipment you need:
- Coffee grounds
- Pour Over Drippers
- Coffee Stand
- Paper filters
- Pour Over Coffee Kettle
- Coffee Grinder
- Scales
- Timers
- Optional: Pour-Over Coffee Kit
- Instructions: The Best Way To Make Coffee
Coffee Grounds
Freshly grounded roasted coffee grounds will always taste the best, but you can buy pre-ground beans if needed. You can buy grounds or roasted beans either online or at pretty much any grocery store or coffee specialty store.
The size of the grounds can make a considerable difference in your coffee quality. If your grounds are too large, water will drain through too fast and your coffee will have a weaker taste. If they’re too small, it’ll take forever to brew a cup. We’ll go into more detail in the following sections.
If you want to take your coffee brewing experience to the next level, you can buy your coffee beans green and roast them yourself. If you’re new to pour-over coffee, it’s going to be easier to buy roasted beans, to begin with, until you master this brewing technique. Eventually, you’ll want to try roasting your own because this will give you the ultimate coffee experience. Check out the video below for an in-depth explanation of why roasting your own coffee is superior to anything else and for roasting techniques.
Coffee Drippers
A dripper looks a lot like a funnel, and, in fact, it behaves the same. It sits on top of your mug or container during the pour-over process and holds the filter with the grounds.
Drippers are typically ceramic, but can also be made out of glass. This piece of equipment is the only significant investment of the pour-over setup, but you can still get a very attractive dripper from Amazon for a bit over $20. Plastic is a cheaper option but usually, produces a lower quality end product. If you’re looking for higher end drippers, check out the lists below.
Canadiano Coffee Maker
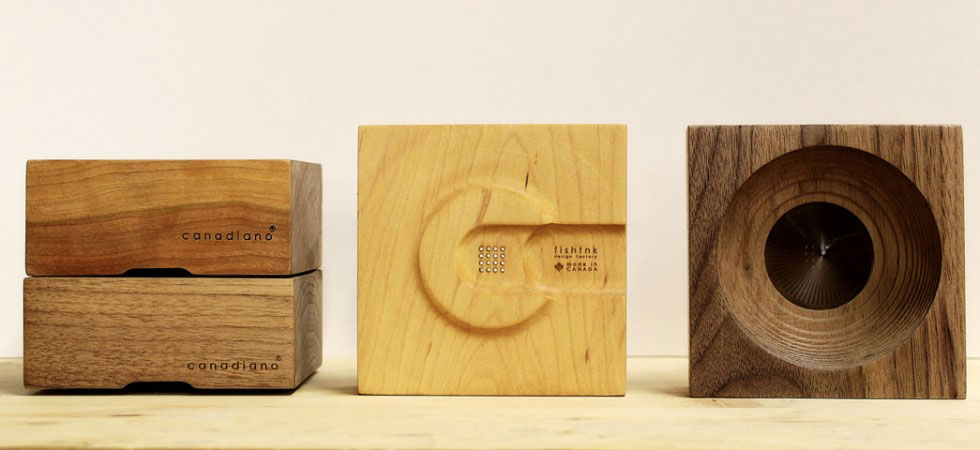
The Canadiano Coffee Maker ($74+) is unlike anything else out there. It’s simply a wood block, perfectly carved to create a gentle curve with an upward pointing cone that acts like a sifter and catches all the sediment from the coffee grounds. Much like different woods give a different flavor to the alcohol that brews within their barrels so to does it give a different flavor to coffee. Canadiano has kept this in mind, recommending different woods for different coffees. This attention to detail and the simplicity of the coffee maker itself makes this perfect for anyone wanting to try something entirely new.
The Pour Mason
The Pour Mason ($35) attachment for Mason Jars is in a whole league of its own. It combines the roots of old fashioned coffee making with the modern attitude of having things do more than one job. The Pour Mason is a simple attachment that goes right on top of a Mason jar and allows you to create a cup of coffee right into it and ready to go. More importantly, it can fit on top of any Mason jar, meaning that you can use it for every Mason jar. Versatile and easy to take anywhere this coffee maker is ideal for anyone who wants to brew their perfect coffee wherever they may be.
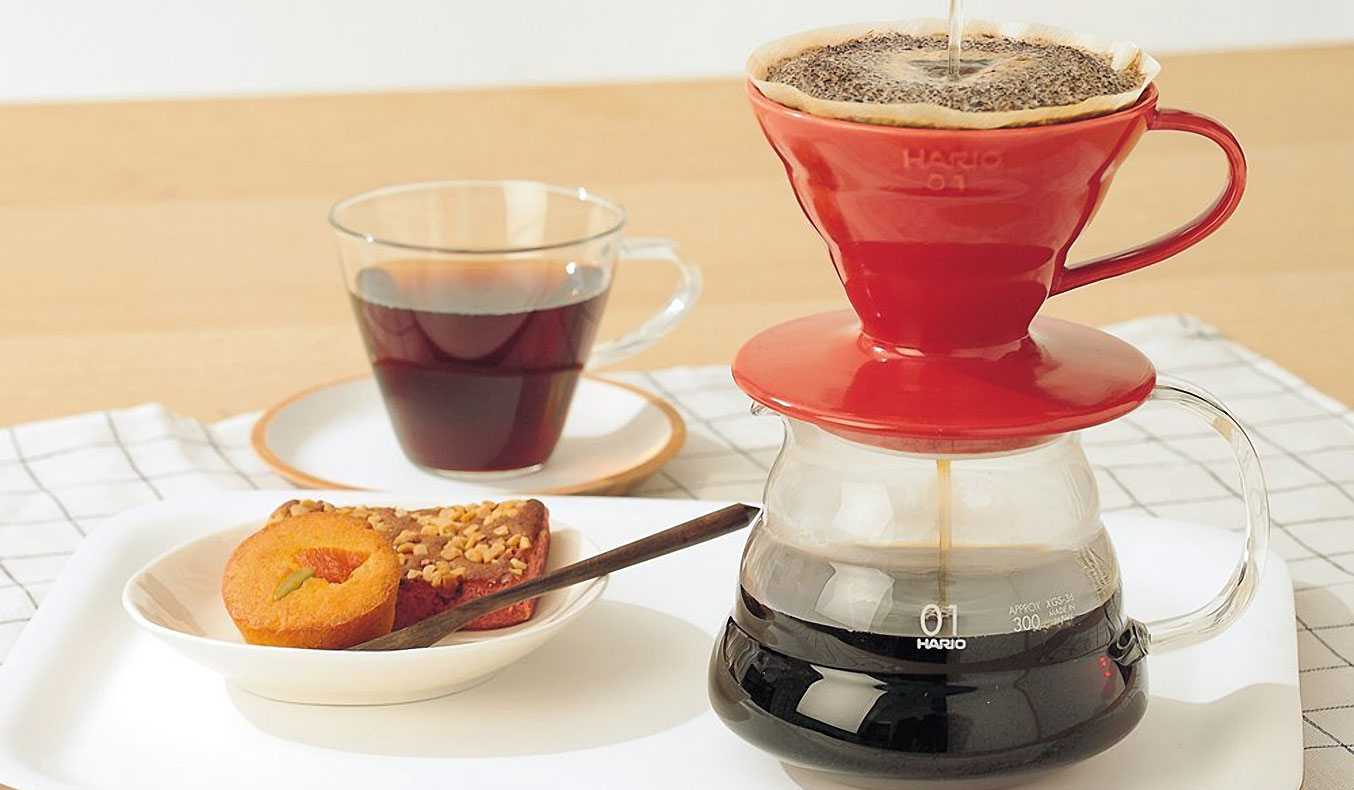
Hario V60 Ceramic Coffee Dripper
The Hario V60 Ceramic Coffee Dripper ($35) is simple but effective. It looks like a regular coffee cup with a wider base but in reality, it is much more than that. Designed to sit on the edge of your cup or coffee decanter the ceramic dripper uses a filter to release slowly dripped coffee into your cup. The beauty of its design is that it can go on top of any cup. This feature allows you to make as little or as much coffee as you want and in the cup of your choice.
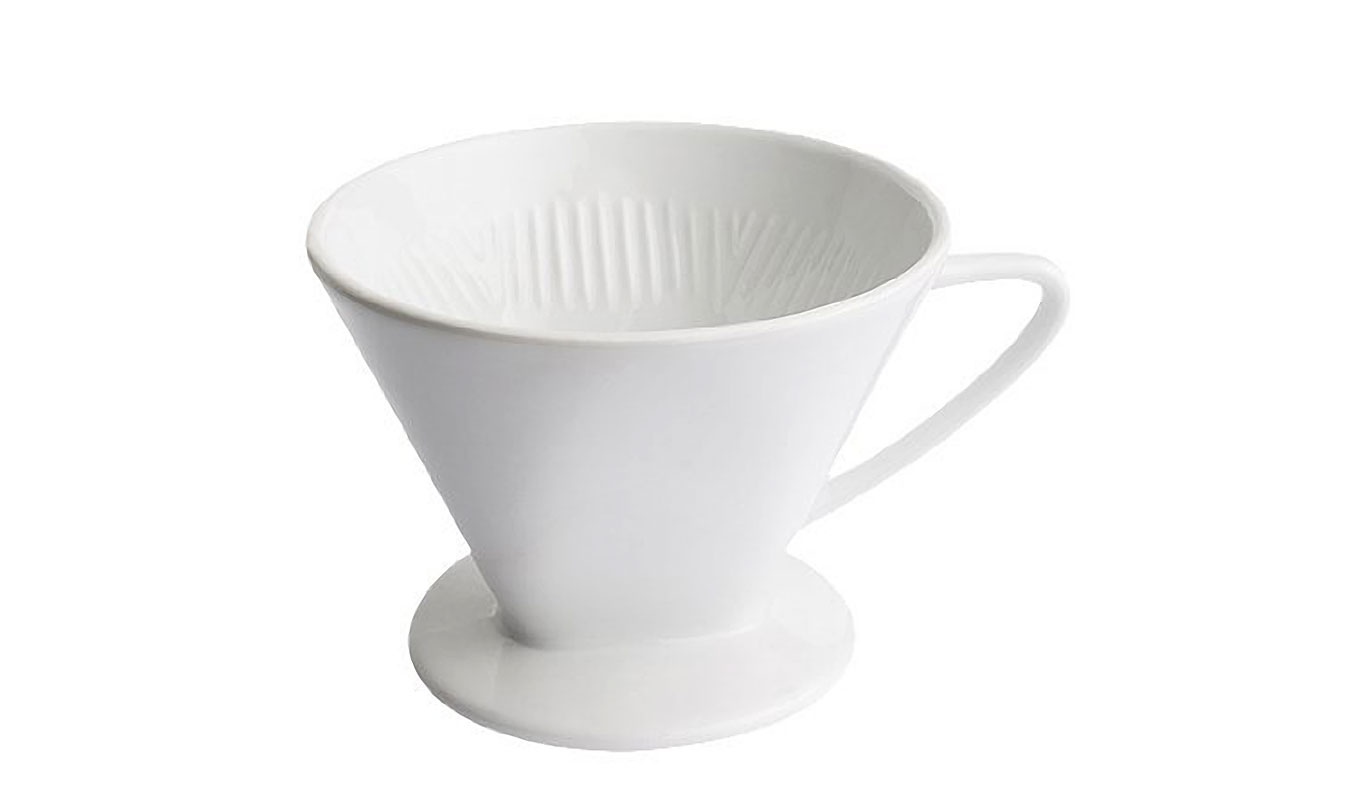
Frieling USA Cilio Porcelain Filter Holder
The Frieling USA Cilio Porcelain Filter Holder is similar in design to the Hario V60 but with a sleeker look and a wider variety of sizes. The slim curved handle and smaller ring around the base rest on the rim of your coffee cup. This design makes this coffee maker similar to a small coffee cup. Especially when combined with its light weight design. Produced by a German company this coffee maker is a pleasant addition to any one’s coffee making repertoire. Furthermore, it’s usable with anything from a mug to a cup to a carafe.
Some of the drippers mentioned above were made to sit directly on your coffee container. But you can also get a stand that allows you to use different types and sizes of containers.
Coffee Stands
The Clive Stand
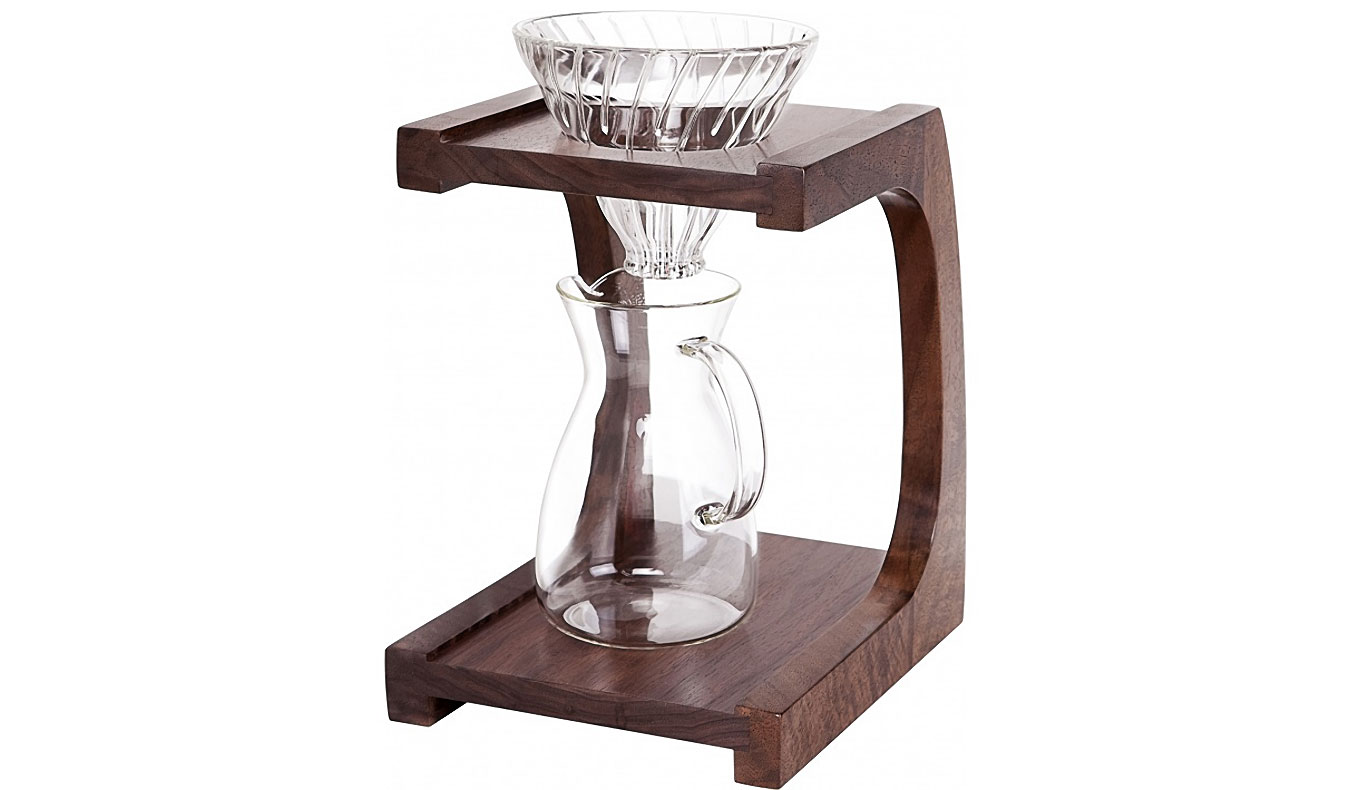
The Clive Stand is the perfect accessory to your pour-over arsenal. The stand is made from salvaged Oregon Walnut that was too small for other uses and reclaimed before it hit the burn pile. The design was meant to evoke the feeling of fine furniture from the likes of masters like Eames and George Nakashima. Each stand is made by hand and works with the Hario V60 dripper and decanter. It can be ordered alone or with the accessories.
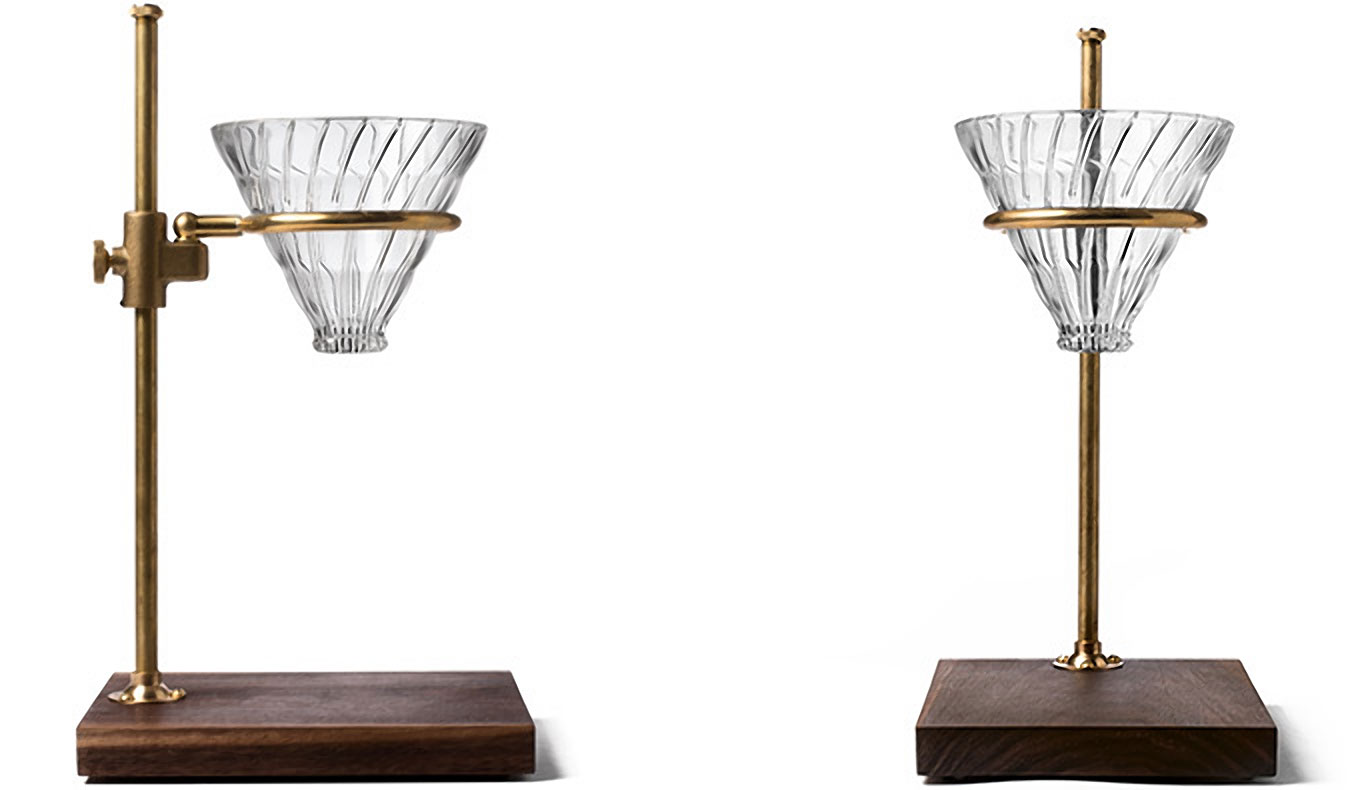
Brass and Walnut Pour Over Coffee Stand
The Brass and Walnut Pour Over Coffee Stand from Kaufmann Mercentile is essentially a stand with a brass ring to hold your dripper. It’s versatile and useful because you can slide the ring up and down to reach the height of your container. The stand’s sleek design and easy to separate parts remind you of a piece of old school science equipment. It is handcrafted, making each stand unique and it is an ideal coffee accessory for those who like to switch between single cups and larger carafes of coffee.
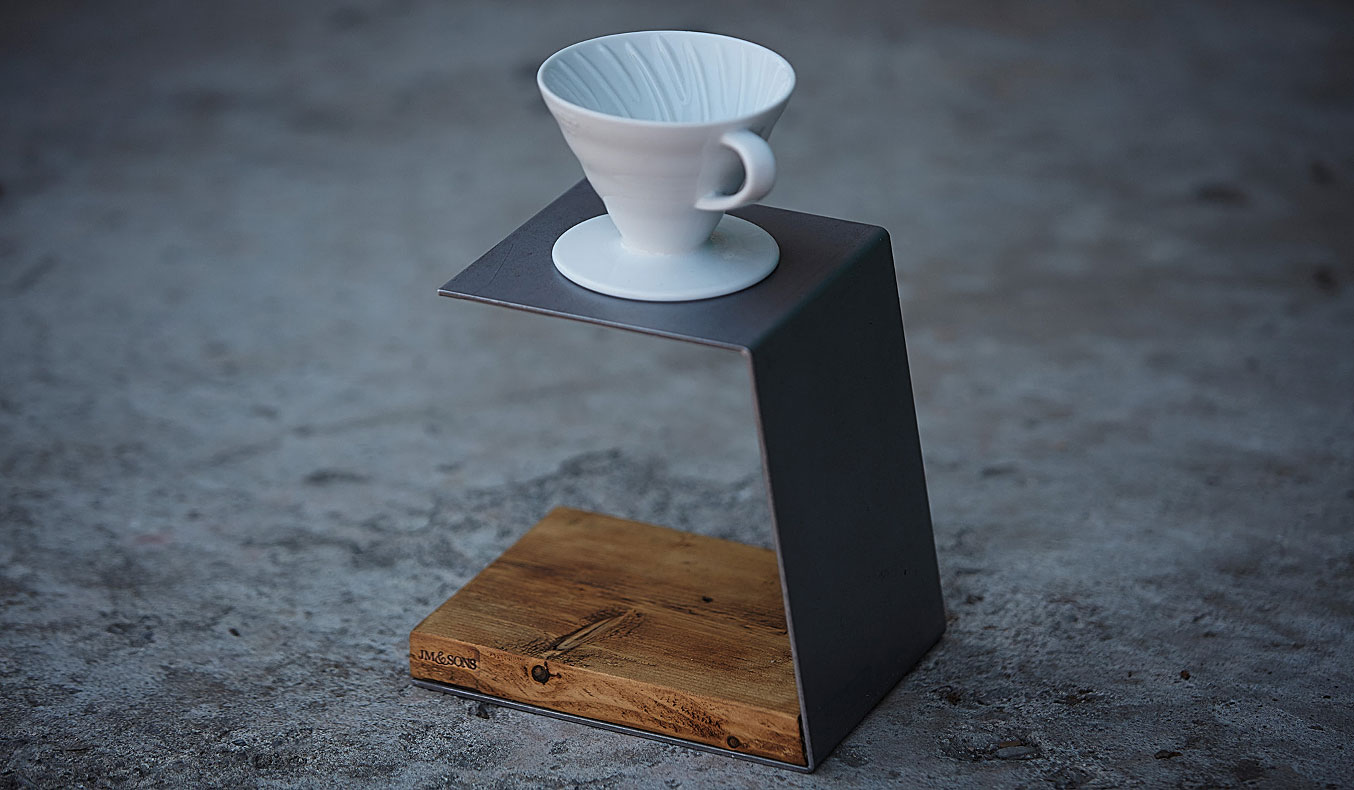
JM and Sons Pour Over Coffee Stand
The JM and Sons Pour Over Coffee Stand is designed for use with any dripper you have at home up to 2.5″ in diameter. It’s beautifully designed from a combination of metal and wood. For those who like a longer pour from brewing to cup, this is perfect as it can create a distance between the cup and the coffee, allowing the air to circulate and activate more of the flavors. The coffee stand comes with the option of ordering a dripper along with the stand.
Coffee Filters
Like your typical coffee maker, pour-over brewing also requires a filter. However, these are specifically made for the process, fitted perfectly for drippers, so don’t use any random filter from the supermarket. They can lead to flavor transfers and taint the brewing process. These are very cheap to buy in bulk, just make sure you get filters that fit your dripper for the best results.
The coffee filter is one of the few things that directly touch the coffee during the brewing process and because of this you need to select the right filter. There are two types of filters, wire mesh, and a paper filter. Both work equally well and which one you use is all a matter of preference. Here are a couple options to consider:
Able Brewing Kone Coffee Filter
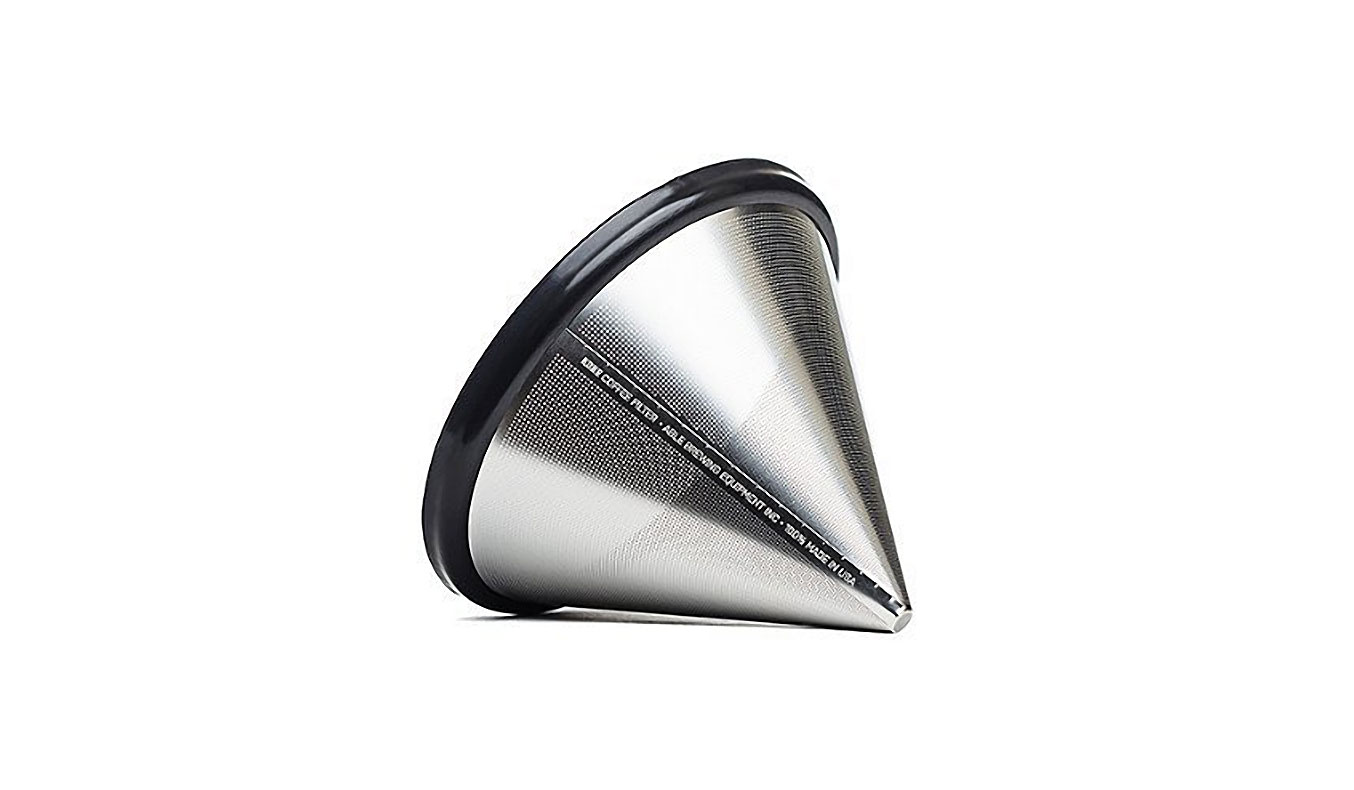
The Able Brewing Kone Coffee Filter is a simple wire mesh cone. It is an excellent reusable alternative to paper filters and the fact that it is a fine wire mesh as opposed to paper means that more of the coffee’s natural oils come through into the brew. Many suggest that a finer ground is ideal for this type of filter, but it’s mostly a matter of preference as to how you like to brew your coffee. It can be used with a variety of coffee makers, particularly the Hario Drippers and Chemex Coffee Makers.
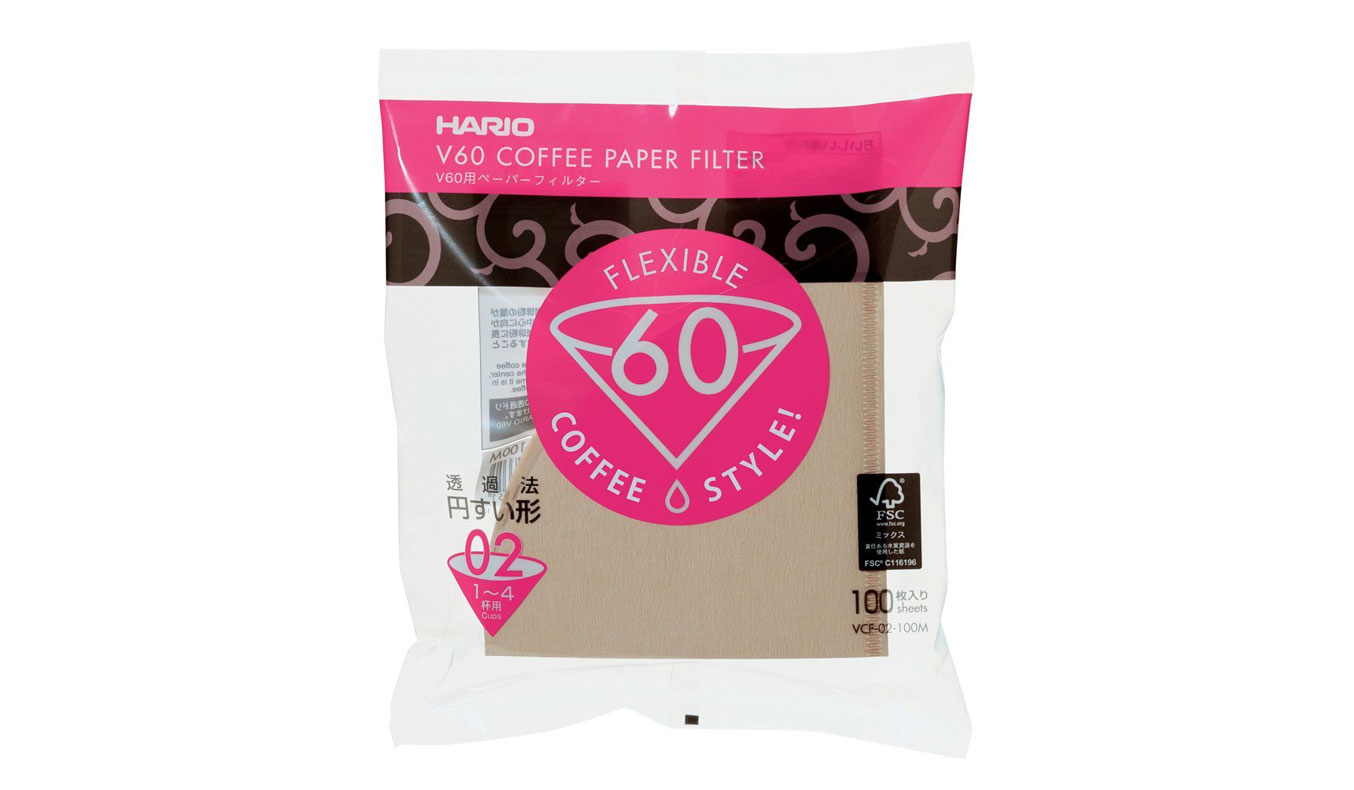
Hario 02 Paper Filter
The Hario 02 Paper Filter is the traditional filter used in more coffee makers. They’re bleach free and designed to help slowly release the brewed coffee down into the cup without affecting the flavor. These filters work best when wet before placing the grounds in and come in large packs, meaning that you can get many cups of coffee for a single purchase. Some reviews even say that they are reusable, but the beauty of paper filters is that you just lift them away from the maker and dispose of them.
Coffee Kettles
The coffee kettle is another important part of your coffee-making arsenal, it is the tool where the first point of contact between coffee and water happens and sets you on your path to creating that perfect cup. Unevenly or too quickly applied water can ruin the whole process. Leaving that perfect cup just a distant dream. That’s why coffee kettles are often used to pour the water over the coffee and why many have long curved spouts. The curved spout gives perfect control of speed and direction. Here are a few suggestions for coffee kettles that you might like;
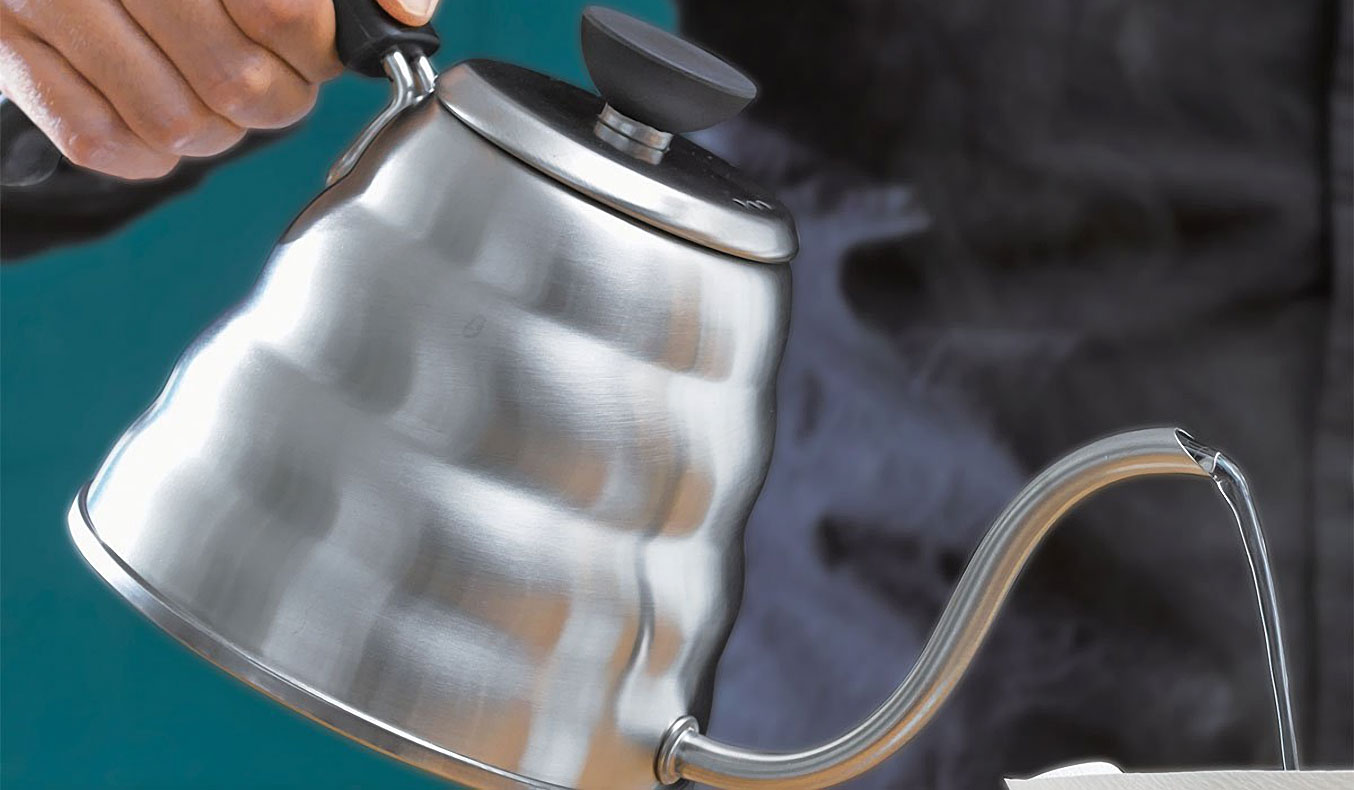
Hario V60 Buono Coffee Drip Kettle
The Hario V60 Buono Coffee Drip Kettle is a beautiful pot with a slim spout that ensures smooth flow, easy pouring, and control. The length of the spout also means the water doesn’t come out too quickly, vital when you’re doing that first pour. The kettle holds enough water for three to four cups.
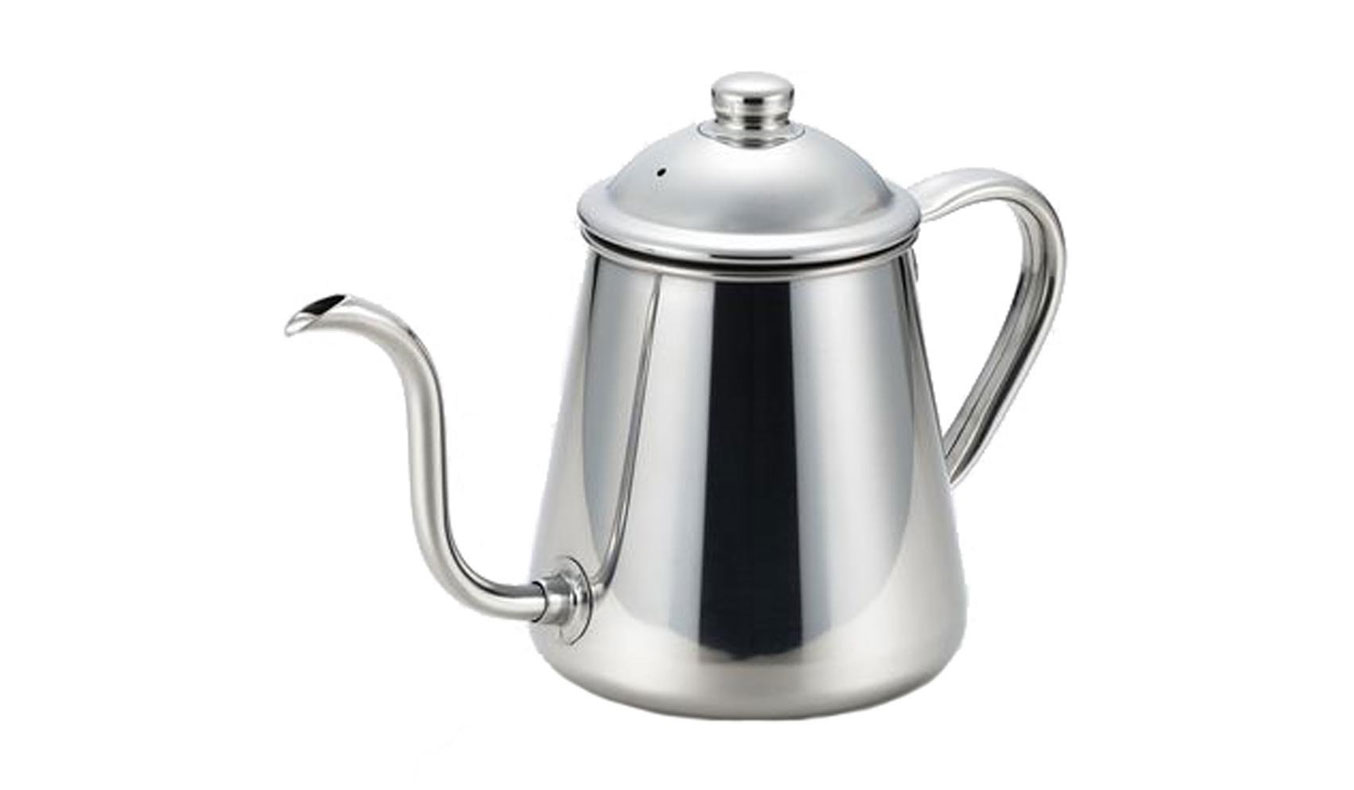
Takahiro Pour Kettle
The Takahiro Pour Kettle is another beauty with a long slim spout ensuring that perfect pour. Its stainless steel design means there is virtually no residue in the taste of the water. The manufacturer suggests not using it over an open flame although electric burners are fine for use. The handle has been known to get hot during heating but compared to the pours of the other kettles many believe it is a small price to pay.
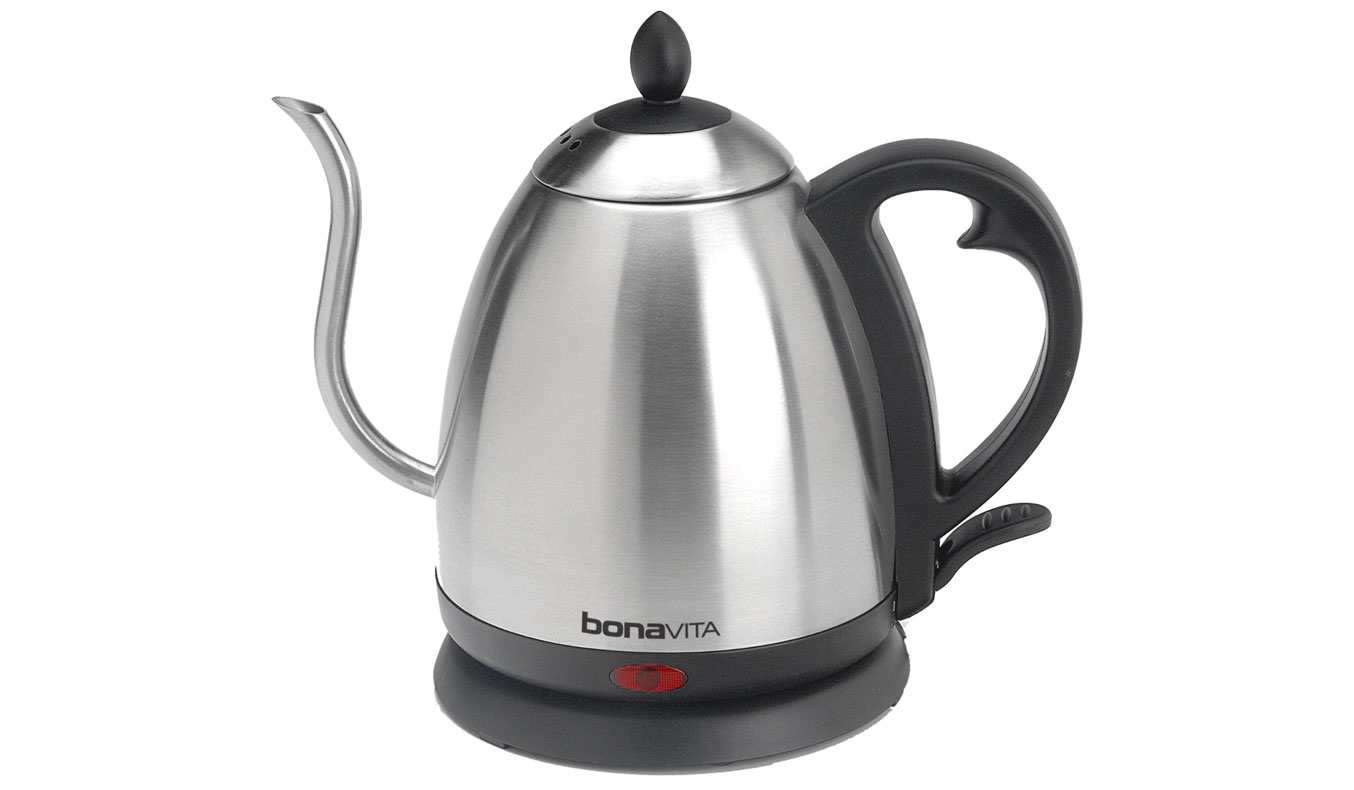
Bonavita Electric Kettle
The Bonavita Electric Kettle is an electric curved spout kettle. Contained entirely in one unit is the means to heat and pour your water without having to use an external heating source. An attractive item, the Bonavita Electric Kettle can be used for other hot drinks such as tea or hot chocolate, but clearly designed with coffee in mind. The slim, elegantly curved spout provides complete control over your pour. The automatic shut off means that your water never boils over.
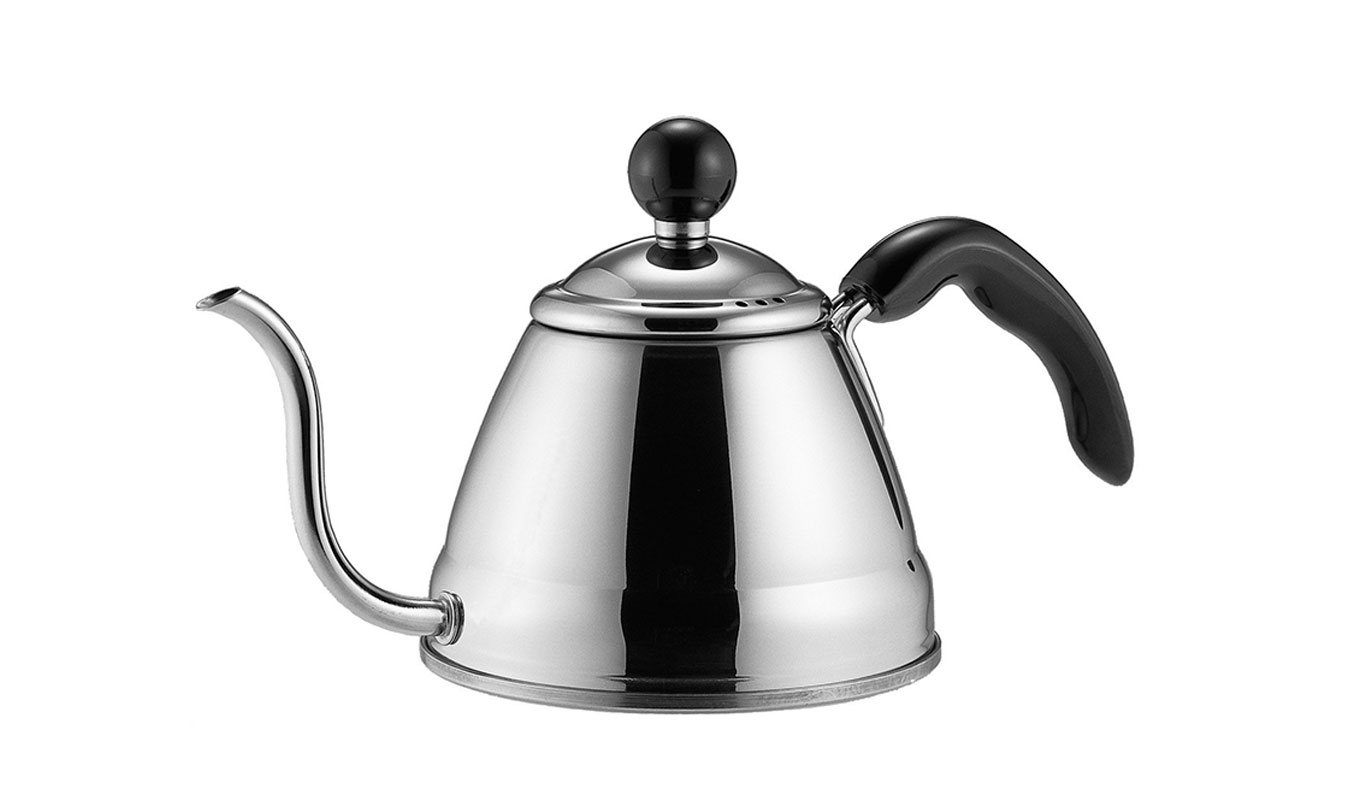
Fino Pour-Over Coffee Kettle
Finally, we have the Fino Pour-Over Kettle, a small chic kettle that can hold enough water for 6 cups of coffee. With an angled handle that keeps your hand away from the hot pot and a curved spout that perfectly controls the flow of water, this kettle is perfect for any pour-over coffee lovers. Not only can it be used on gas and electric stoves but it is also dishwasher safe.
Pour Over Coffee Grinders
Grinders are essential to the coffee lover. Anyone who drinks coffee knows that coffee beans need to be ground up as closely to the brewing process as possible to keep the maximum flavor. To do this, you need to buy the coffee beans whole and grind them at home. Some people prefer manual grinders while others prefer automatic grinders. For those who aren’t sure which grinder is for them, here are some options:
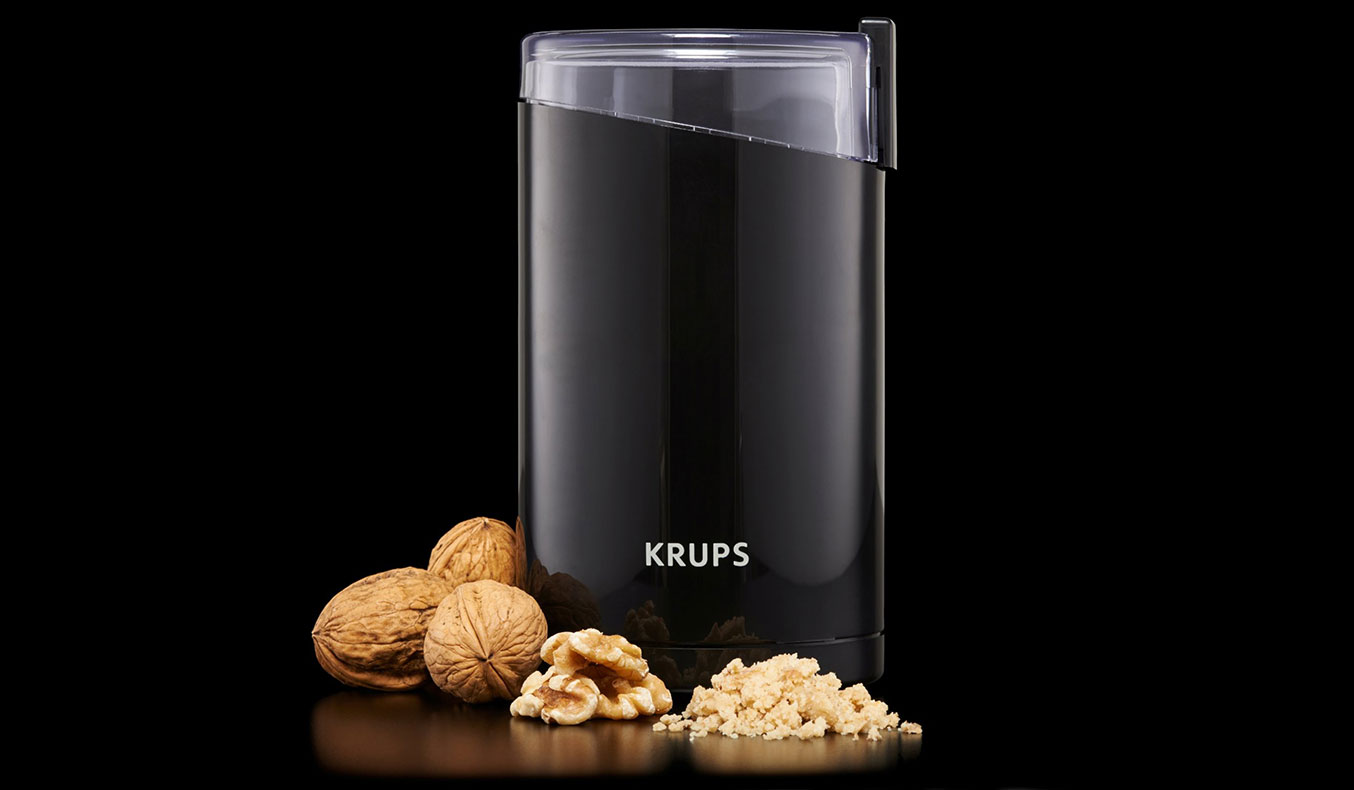
The KRUPS F203 Electric Spice and Coffee Grinder can be used for grinding more than just coffee. You can grind spices, nuts, and grains as well as coffee beans. Because of this versatility, it’s certainly worth the money. You can also change the coarseness of the grind, ranging from fine to very coarse while the large capacity makes enough grinds to yield up to 12 cups of coffee. More importantly, the shape of the grinder combined with the blades means that the grind is uniform, leaving you with a smooth, even grind without any unexpected large chunks left.
Hario Cannister Ceramic Coffee Mill
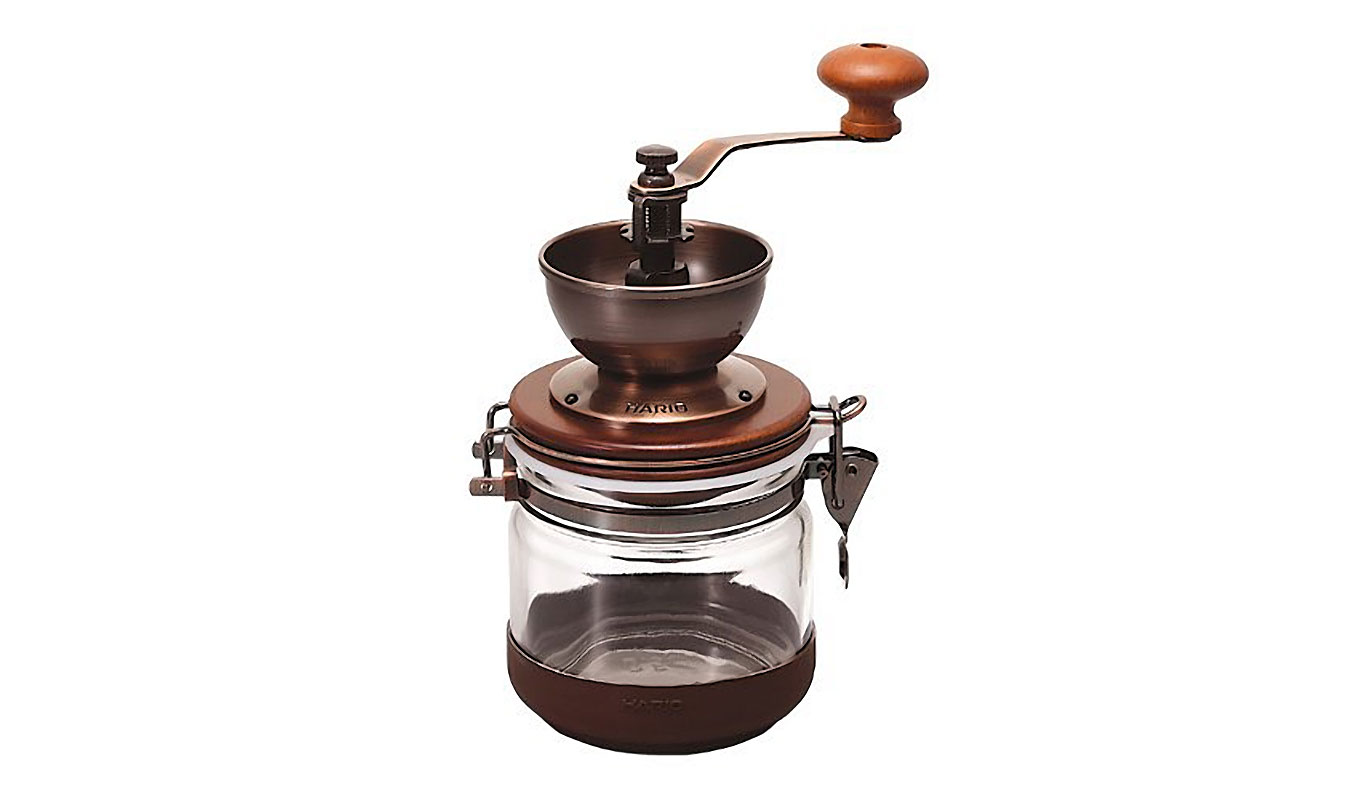
The Hario Cannister Ceramic Coffee Mill is a modern twist on a classic that looks great and allows you to grind your beans by hand. With a taste of eras gone by and the golden age of coffee this manual grinder gives you the ability to choose how coarsely ground you want your beans by providing complete control over the process. You choose how much coffee is ground, and you stop grinding when the beans are at the perfect consistency. The storage jar at the bottom looks great and allows you to store leftover grounds to use later.
Coffee Scales
If you want to perfect this brewing technique, a scale can help you achieve a high level of consistency. You can measure both the amount of coffee you use and the weight of the final liquid coffee.
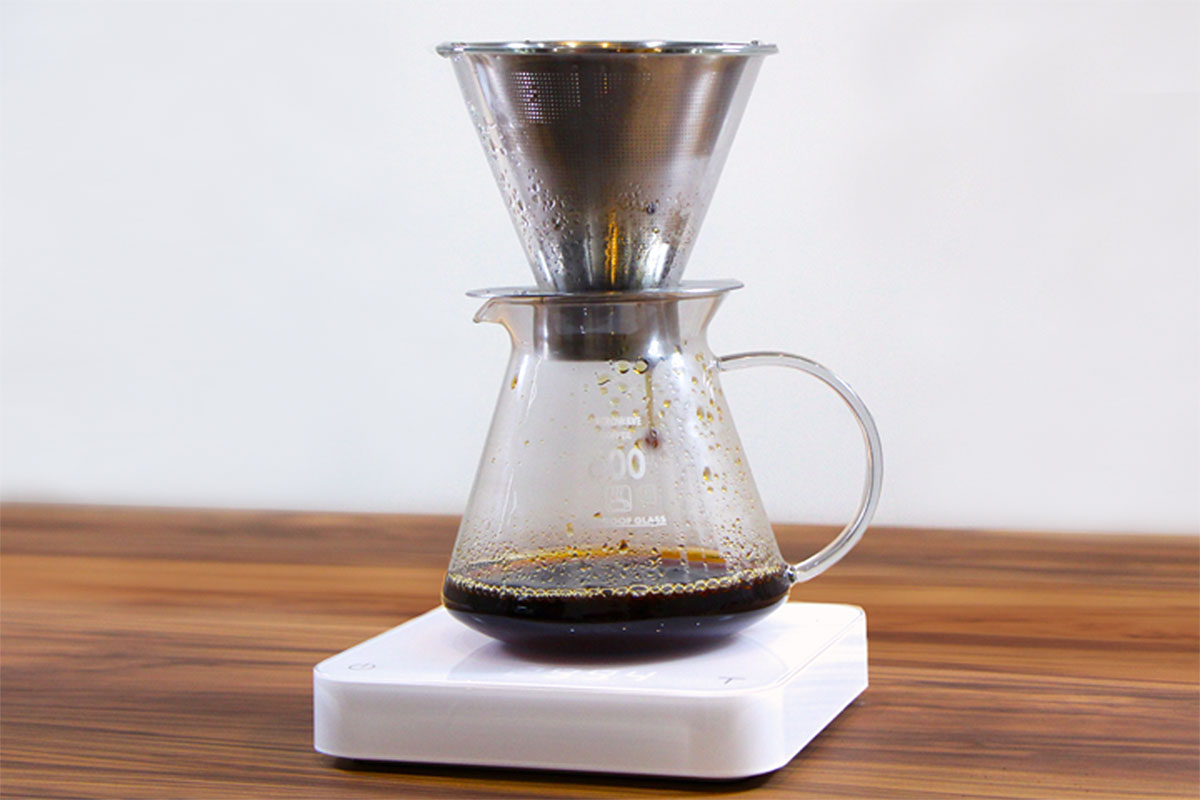
You’ll need to measure the grinds beforehand by themselves, and then put the entire setup (including mug and dripper) onto the scale. The scale should have an option to reset or “tare” it, which will reset it from zero. From here you just need to add the right amount of water.
You’ll need about 177 mL (177 grams) of water for every 10.6 grams of coffee. Here’s a handy table that scales up the ratio of coffee to water for any amount, and has different units of measurement.
There are a lot of scales out there, but there are two in particular that I can recommend for you.
Jennings CJ-600 Digital Scale
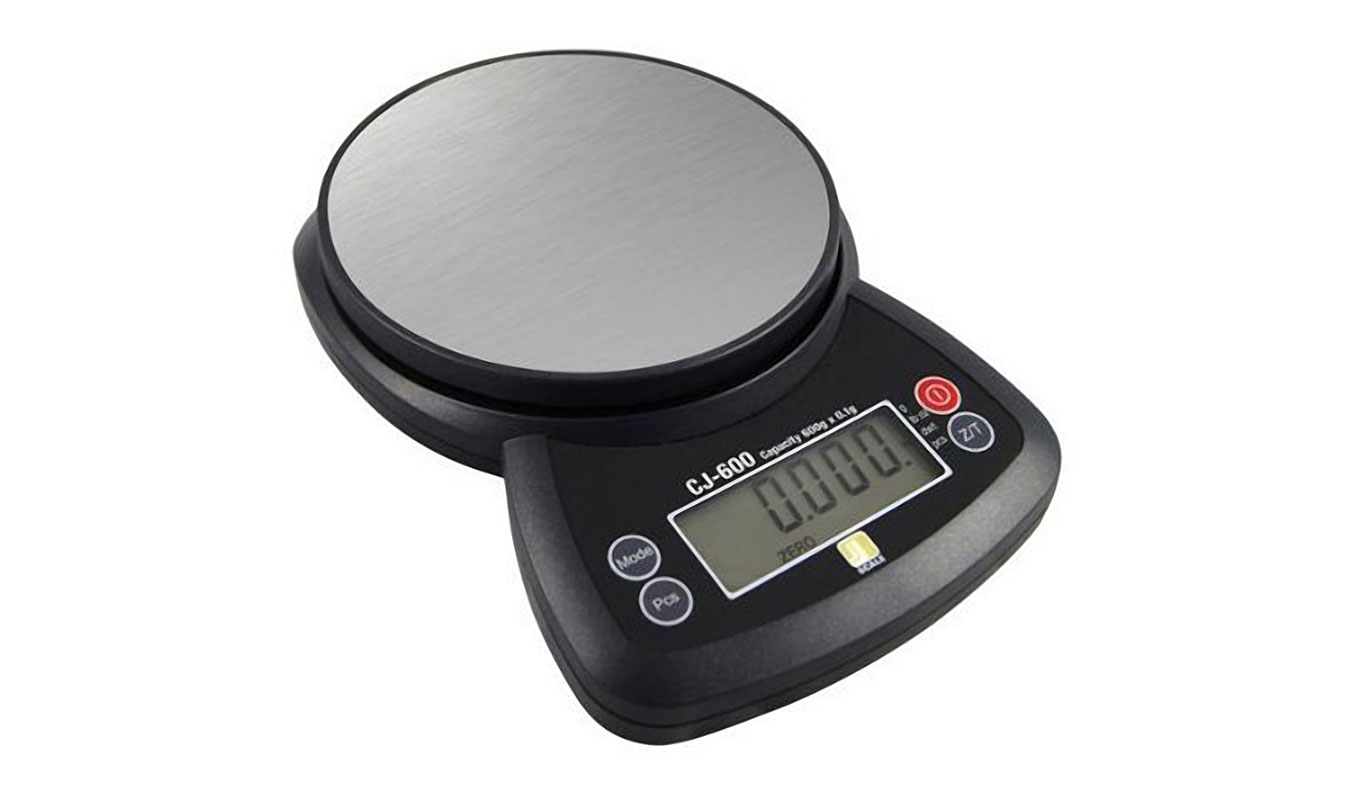
First, the Jennings CJ-600 Digital Scale is available for a reasonable price. It has a taring function (the way you reset the weight to zero after popping your cup or dish onto the tray) and an auto-off setting that turns it off automatically after a certain amount of time. This scale is simple and easy to use. It does what you need with the minimum of bells and whistles. It’s also received positive reviews, mostly four and five stars and many positive comments on the accuracy of the scale.
Acaia Scale
Secondly, for the more discerning coffee connoisseur is the Acaia Scale ($12). A scale completely devoted to the art of coffee making. With an app that hooks up to multiple mobile platforms, it provides brewing times, weight measurements and different programs for various types of coffee. It also provides the option of saving all of your coffee programs, allowing you to replicate that perfect cup every time. This scale is incredibly accurate, with an easily used taring function that links straight up to the timer.
Timers
Timing is everything when it comes to brewing that perfect cup of coffee. Whether it’s timing how long your grounds have been blooming, how long that all important first pour has been or how long it takes to brew your cup of coffee. You need to know how long each step takes so you can replicate the brewing process for every cup. Any timer will do and if you buy the Acaia Scale above you don’t have to worry about buying a separate timer.
Wrenwane Digital Timer
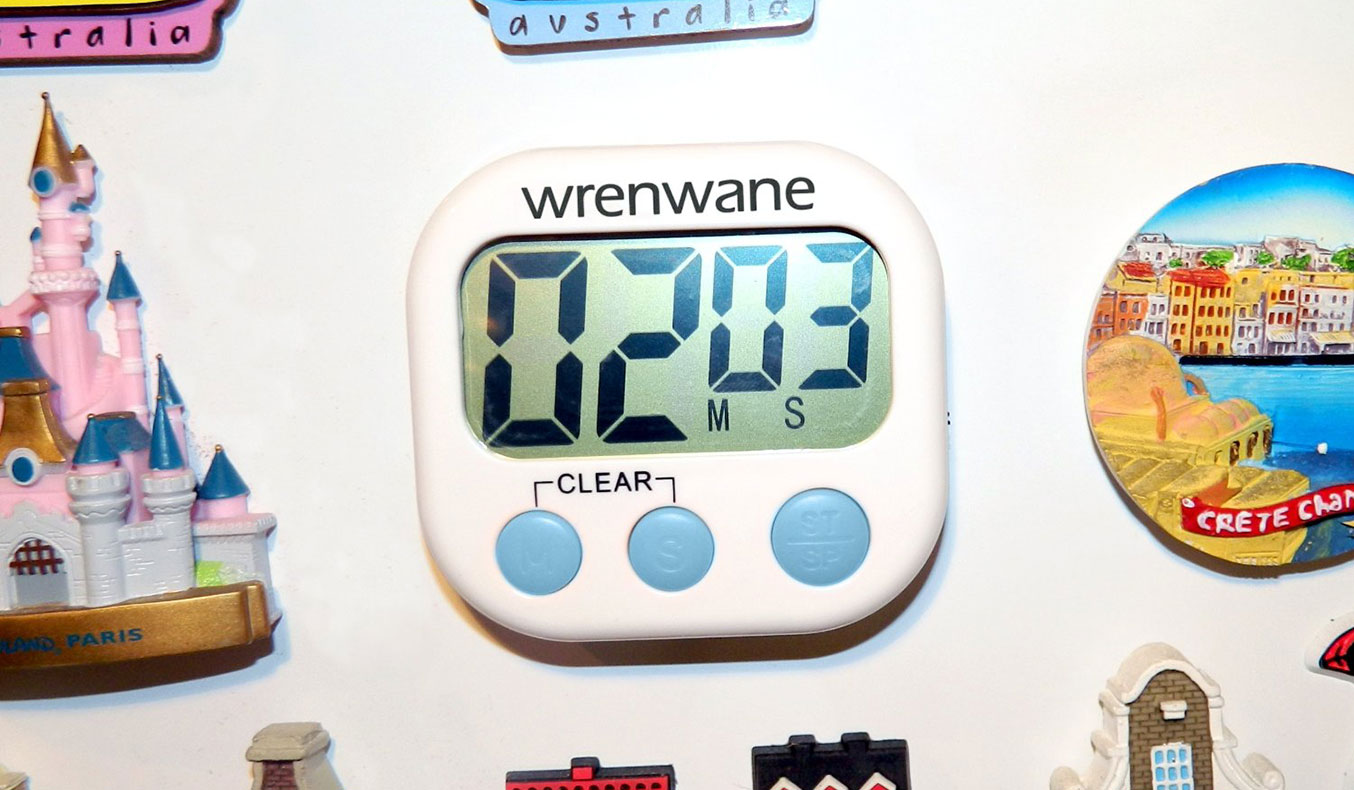
If you want something that is accurate and affordable, I would suggest the Wrenwane Digital Timer. Timers have many uses, and this one is no exception. It comes with three options for displaying the timer, has a small magnet to attach to the refrigerator, a hook for hooking over door handles, and a simple retractable stand that allows it to stand free. The design is small and sleek, fits into the palm of your hand and the numbers are large and easy to read.
Alternative Option: Buy a Pour-Over Coffee Kit
If you want the dripper and receptacle all in one beautiful package, you’re looking to purchase a pour-over coffee kit.
The most popular is by the company Chemex, which makes a variety of pour-over kits. Their kits can be used to brew coffee in different batches with less manual work than the process that we will detail later in this article.
Chemex Filter-Drip Pour Over Coffee Maker
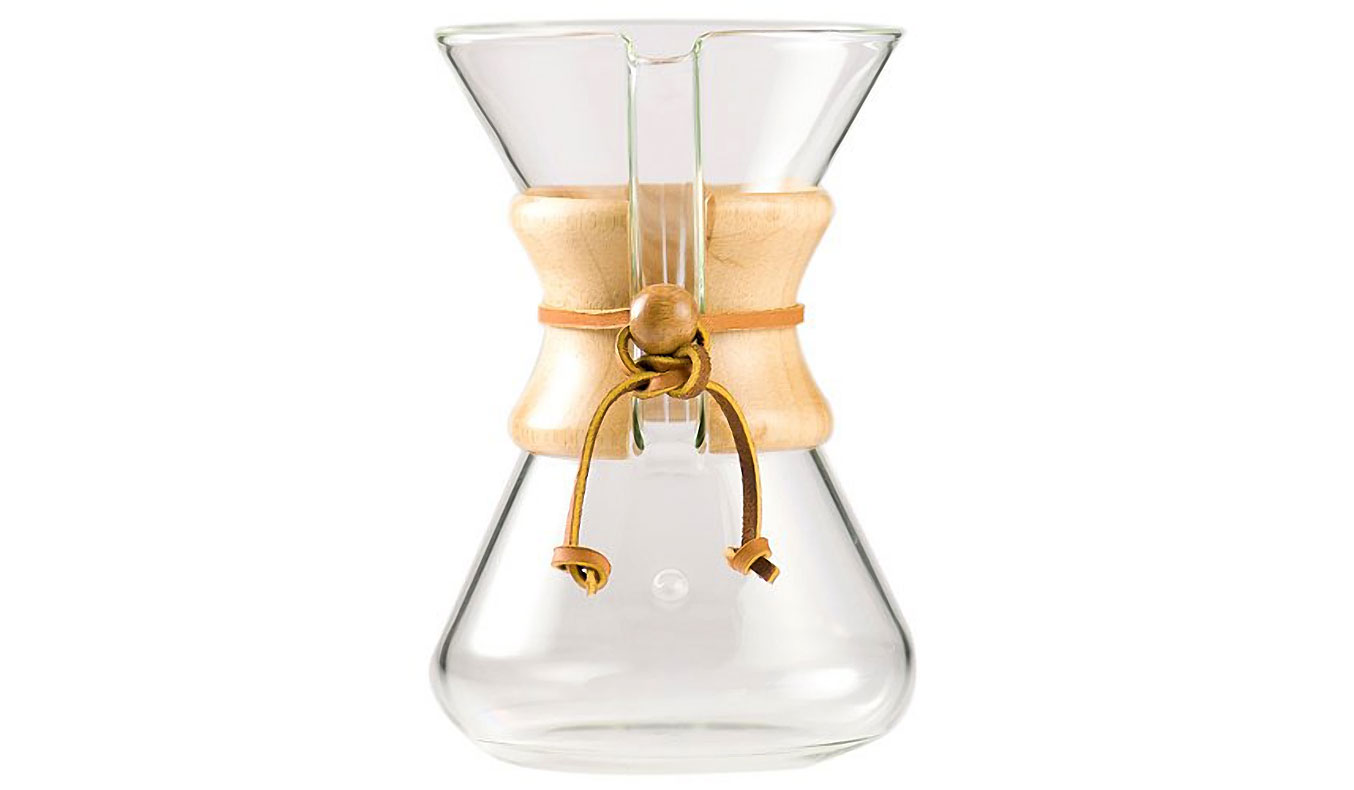
The Chemex Filter-Drip Coffee Maker is an elegant hand blown carafe available in many sizes. The angled opening means that a filter, complete with coffee, can sit safely inside for the brewing process and then be quickly and easily removed once the brew is complete. The spout on the top allows for easy pouring and the wooden ring around the narrowest point allows for complete control without worrying about burning yourself with hot glass.
Manual Pour Over Coffeemaker No1
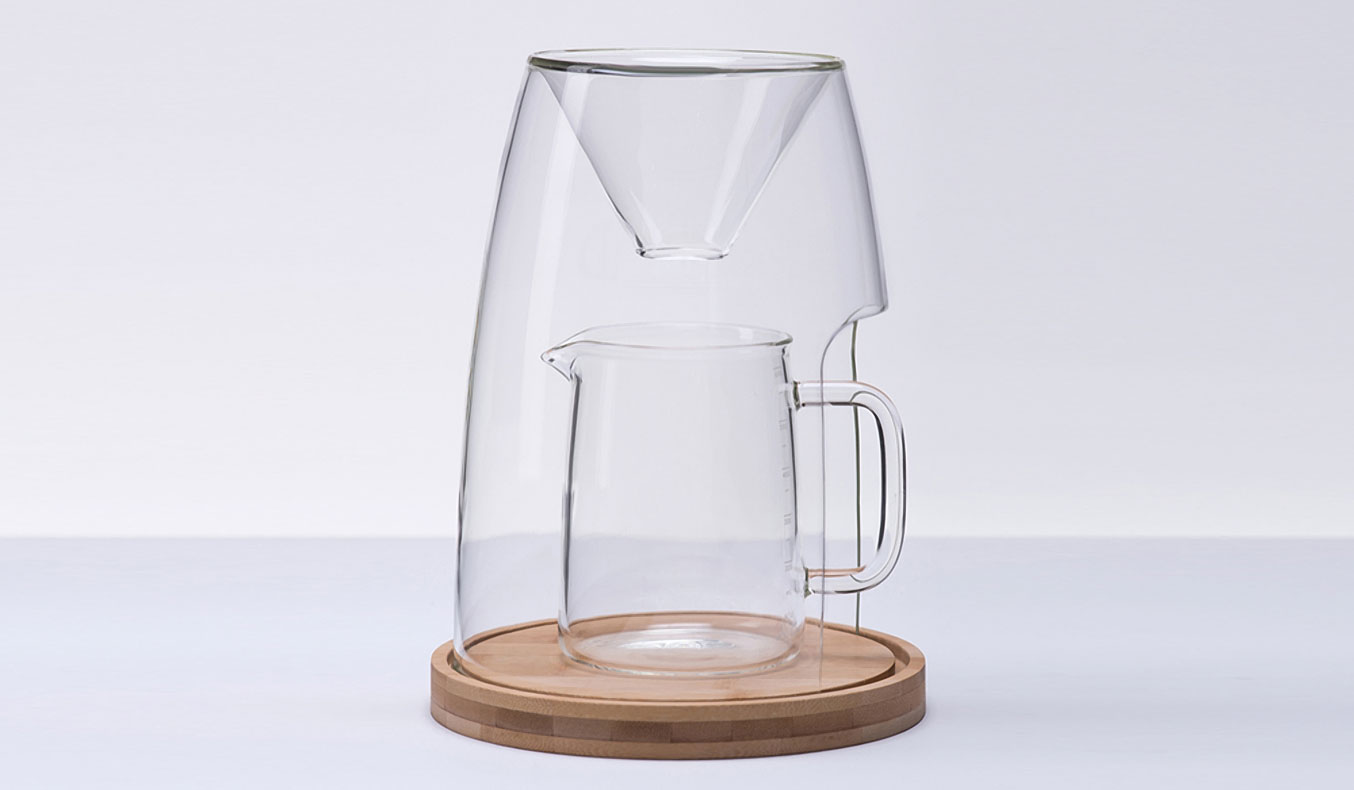
The Manual Coffeemaker No1 utilizes a unique design not seen in any other coffee-making device. Shaped like a pod with the downward facing cone this coffee maker surrounds the container. Not only does this look different to most other coffee makers but it has an actual function. It locks in the brewing heat, ensuring that your coffee is the temperature you want. This coffee maker can use both carafes and cups and the slower dripping time is perfect for getting every bit of flavor from the grounds.
Instructions: The Best Way To Make Coffee
The Variables Of Pour-Over Coffee: Becoming an Artist
Now you have an idea of what pour-over coffee is all about, but there are a few more things you need to learn before attempting to craft a glorious cup of coffee.
Like other coffee brewing techniques, many variables affect the quality of the end product.
Ground Sizes
As mentioned before, ground size can have a significant effect on the strength, quality, and speed of the pour-over process.
When ground particles are small, they form an almost perfect barrier, which prevents water from passing through at any appreciable rate. Although this gives the water a lot of time to absorb nutrients from the grounds, it would take too long to brew even a single cup of coffee.
At the other extreme, very large ground particles, there is an abundance of space between grounds allowing water to flow smoothly. While it won’t take long to fill a cup, the water doesn’t have enough time to absorb a significant amount of coffee nutrients, resulting in a weak end product.
If you’re grinding beans, you may have to experiment with the size of the grounds. It is recommended to start on a medium setting and adjust from there.
Once you start pouring water over the grounds, it should take about 3 to 4 minutes to fill a cup. If it takes too long, use larger grounds, and if it’s too quick (or the coffee is too weak), use smaller grounds. It may take a few run-throughs to perfect the sizing.
Coffee Grounds Quantity: How Much?
The
The golden ratio that most coffee shops that offer pour-over coffee use
If you have a scale, you can perform the pour-over process on it to measure how much water you have added. If you do not have a scale, do your best to pour 115 mL, which is about 3.9 ounces. Again, this ratio is not set in stone, feel free to experiment.
Type of Coffee
You can (and should) try different kinds of beans and roasts. Darker roasts are typically sweeter, and faster to brew, usually taking about 2.5 to 3 minutes, while light roasts can take up to 4 minutes. The type of roast, bean and ground size will all contribute to the brewing time.
Length of Brewing
The maximum duration of a good pour-over coffee brewing process is six minutes. The length of the process will determine the strength of the coffee. Aim for between three and four minutes, not including the setup and preparation. The length of your brewing should give you feedback whether you used the correct amount of grounds and if they’re a suitable size.
A Few Final Important Pour-Over Terms and Tips
Before we dig into the process of making a cup of pour-over coffee, there are a few more terms that you’ll need to know and understand.
Wetting
The wetting process refers to the first time that that water is poured onto dry coffee grounds to wet them.
Blooming
When you add water to coffee grounds, it releases carbon dioxide from the grounds as the byproduct of a reaction. As you may know from soda drinks, carbon dioxide results in bubbling and sometimes foaming.
When you initially add water to the coffee grounds in your filter, they will “bloom”, which means that they will froth up a bit as the carbon dioxide is being released. It’s imperative to let the carbon dioxide dissipate before continuing, or it can block the release of vital coffee nutrients that affect the taste of your drink.
The length of this process depends on the freshness and size of your grounds but is typically 30 to 45 seconds long.
Make Detailed Notes
Record all the above variables so that once you perfect your procedure, you can repeat it whenever you want. You can also look up recipes online to see how others have fared with your set-up (or a similar one).
Note that different types of coffee will require their own procedure, so don’t be alarmed if you get excellent results using a particular method for one bean while getting less-than-great results using the same procedure for another.
Step-By-Step: Make a Great Cup of Pour-Over Coffee
Despite piles of chemistry research and millions of dollars being spent testing different types of coffee beans and brewing techniques, making your cup of pour-over coffee is insanely simple.
If you’re a coffee fanatic, you’ll probably enjoy reading those science-backed articles, but for those who just want a great cup of coffee, let’s break down the process.
Required Equipment:
- Coffee beans of your choosing
- Water and a kettle (or pot for boiling)
- Pour-over coffee dripper (the “funnel”)
- Paper coffee filter
- Scale
- Timer
Step 1: Boil the water. Put enough water into your kettle or pot, and then bring the water to a boil. For these instructions, we’re going to be using 8 ounces of water. Your target temperature is 195-205 degrees.
Step 2: Put the dripper into the mug, and the filter into the dripper. Ensure the filter and dripper are as level and snug as possible.
Step 3: Pour a bit of boiling water into the dripper (while empty). This procedure gets rid of any paper taste that the filter might add when fresh.
Step 4: Empty the mug and place
Step 5: Measure and pour in coffee grounds. To make one cup of coffee, you want to use 14 grams of coffee grounds and 8 ounces of water.
Tip: If it’s your first time, err on the high side of the grounds you use. If the coffee’s too strong, you can always just add more water after and dilute it.
Step 6: Start your timer and Create the “bloom” by pouring in a bit of water. Before you pour any water, let it cool for 30 seconds to a minute. The water should be between 195 and 205 degrees Fahrenheit (91 to 96 Celsius). If you have a thermometer, feel free to measure this. Try to err on the top end of this range, as colder water (below 195) doesn’t extract nutrients efficiently. Pour about 21-25 grams of the hot water over your grounds until covered. The intent of this first pour is to get your grounds to bloom. Let them settle before continuing, which usually takes 30 to 45 seconds.
At 30 seconds start a second pour. Use about 70 grams of water and pour in a circular motion.
Step 7: Pour until the mug is full. At 1 minute start the final pour. Slowly keep pouring water (still at 195 to 205 Fahrenheit) on the grounds in a slow circular motion until you’ve poured the entire 8 ounces of water. This action ensures an even distribution amongst the grounds. Avoid splashing along the sides of the funnel, as it will mostly run down with minimal contact with the coffee grounds. The cup of coffee should be completed at about 2:30 minutes.
Be careful not to pour too much water and overfill the mug. You’re working with scalding water, which can be dangerous.
Step 8 (Optional): Stir the grounds. If you want to squeeze out every last ounce of flavor, give the grounds a quick, gentle stir, releasing some of the trapped water.
Step 9:
Step 10: Mix coffee with a spoon or stirrer. If you suspect anything isn’t fully mixed, give it a quick swirl before you begin drinking.
It may take a few cups before you perfect your pour-over coffee technique, so don’t be discouraged if the first one doesn’t blow you away as much as you were expecting.
Adjust your process according to the variables discussed and keep tweaking until you get a consistently fantastic cup of coffee. Once you get it right, you’ll be able to make incredibly high-quality coffee from home whenever you want.
